Does opening your child’s bedroom door feel like bracing for an avalanche? We have all been there—treading carefully past a mountain of mismatched shoes, tangled dress-up clothes, and toy bins overflowing into the hallway. While kids’ bedrooms are meant to be spaces for play and creativity, a chaotic storage area can quickly turn into a source of daily stress for both parents and children. Implementing smart kids craft closet organization strategies is not just about aesthetics; it is about teaching independence, streamlining your morning routine, and creating a calm environment where everything has a designated home. When you transform a cluttered mess into a functional sanctuary, you reclaim precious time previously spent hunting for a missing soccer cleat or a favorite hoodie.
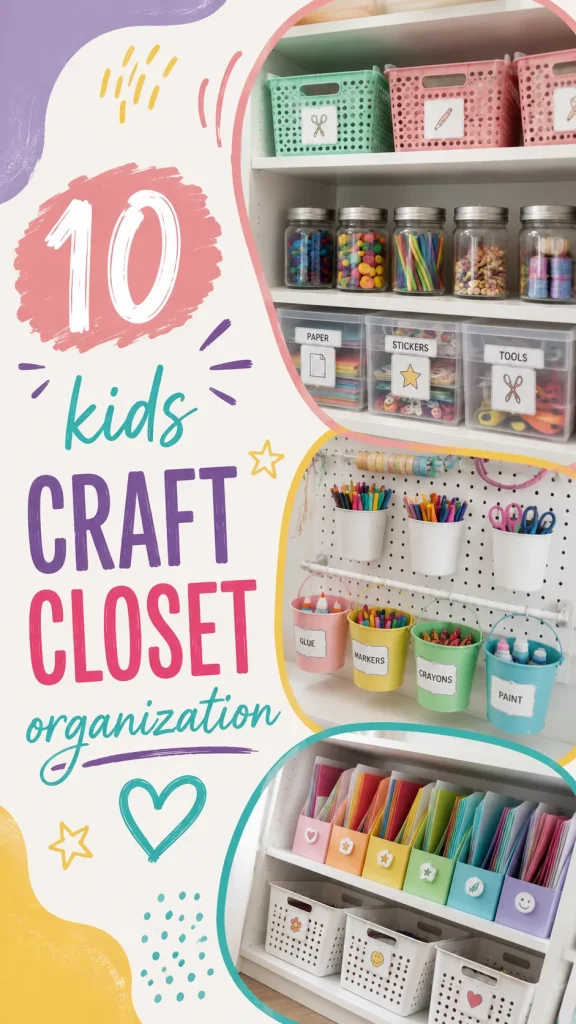
Whether you are working with a tiny reach-in closet or a sprawling walk-in space, the secret lies in adapting storage solutions to your child’s height and developmental stage. From colorful DIY dividers to clever vertical shelving hacks, there are endless ways to make the space work harder for your family. By focusing on accessible, kid-friendly systems, you empower your little ones to participate in tidying up, turning a chore into a manageable habit. Ready to tackle the clutter? Let’s explore ten practical, creative kids craft closet organization projects that will turn that disaster zone into a masterclass of efficiency and style.
1. Fabric Hanging Pocket Organizers
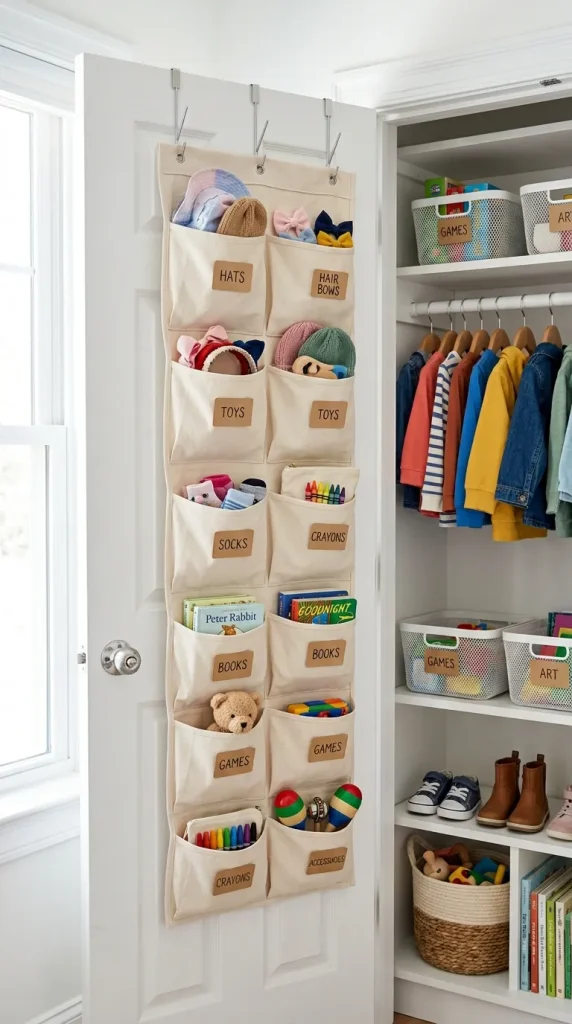
If your floor space is already occupied by toy bins and bulky items, looking up is the best strategy. Hanging pocket organizers are not just for shoes; they are perfect for managing the myriad of small accessories that clutter a child’s room. From hair bows and headbands to small action figures, sunglasses, and art supplies, these pockets provide a home for everything that usually ends up in a heap on the floor. By customizing these organizers with labels or colorful fabric paint, you turn a standard utility item into a vibrant feature that fits seamlessly into your child’s bedroom decor.
How to Make
Start by selecting a high-quality over-the-door fabric organizer with clear or solid pockets. Before hanging, lay it flat on a clean surface. Use fabric markers or iron-on patches to designate specific pockets for items like socks, underwear, or small toys. If the pockets are clear, slip a piece of colorful cardstock or a photo label into each pocket to indicate what belongs inside—this is especially helpful for toddlers who are not yet reading. Mount the organizer securely over the closet door or onto a dedicated hook on the wall inside the closet. Ensure it is placed at a height where your child can easily reach the bottom pockets without assistance.
Things Needed
- Over-the-door fabric pocket organizer
- Fabric markers or iron-on letters
- Colorful cardstock for labels
- Sturdy mounting hooks or over-the-door hangers
- Double-sided tape or adhesive dots
2. Personalized Cardboard Bin Dividers
Standard bins often become “junk magnets” where everything gets mixed together, but custom dividers can change the game. By creating your own internal bin dividers using stiff cardboard or plastic sheets, you can partition a large bin into multiple sections. This is an excellent way to separate things like building blocks, dolls, and art supplies within the same container. This method encourages your child to think about categories, making it much easier for them to retrieve what they need without dumping the entire bin onto the floor, which is a major win for your sanity.
How to Make
Measure the internal dimensions of your existing plastic bins. Cut pieces of heavy-duty cardboard to create a “plus” or “T” shaped divider system that fits snugly inside. For added durability, wrap the cardboard edges in colorful duct tape or contact paper—this also prevents paper cuts. Once the dividers are in place, test them for stability. If they feel loose, use a hot glue gun to secure them to the sides of the bin. To finish, create custom tags for each section, attaching them to the top rim of the bin so your child knows exactly which side of the bin gets the Legos and which side gets the cars.
Things Needed
- Heavy-duty cardboard or stiff plastic sheets
- Colorful duct tape or decorative contact paper
- Hot glue gun
- Scissors or a utility knife
- Adhesive index card labels

3. Rope-Wrapped Storage Crate
Plastic containers can sometimes feel cold and impersonal, but a DIY rope-wrapped crate brings warmth and texture to any kids craft closet organization system. These crates are incredibly sturdy and can easily be pulled out from closet shelves, making them perfect for holding heavy items like books or craft kits. The rough texture of the rope provides a great grip for small hands, and the rustic look bridges the gap between childhood play and a more sophisticated bedroom style that won’t look dated as they grow older.
How to Make
Find a sturdy wooden or plastic crate. Apply a thick line of hot glue to the bottom corner of the crate and begin winding natural sisal or jute rope tightly around the entire exterior. Keep the rope taut as you wrap, applying glue periodically to keep it from slipping. Work your way up until the entire surface is covered. For a pop of color, you can wrap a few rows with neon-colored yarn. Once the glue has dried, line the inside with a fabric liner or a simple pillowcase to keep smaller items from catching on the wood. Add a wooden tag labeled with your child’s initials.
Things Needed
- Wooden or plastic storage crate
- Large spool of sisal or jute rope
- Hot glue gun and plenty of glue sticks
- Scissors
- Fabric liner or old pillowcase
- Wooden gift tags and markers
4. Hanging Rod Shelf Divider
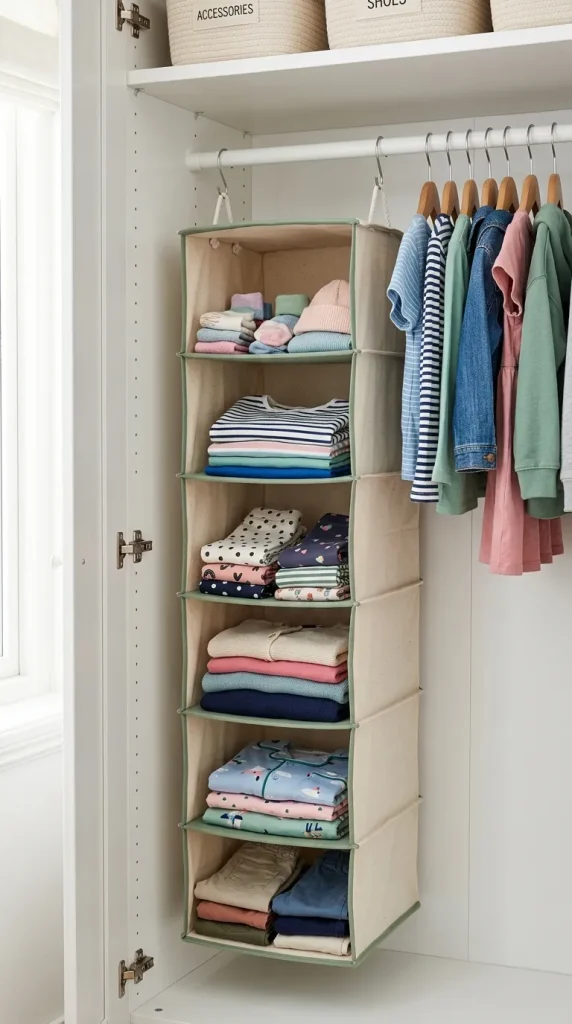
Sometimes the closet rod is the most underutilized area for storage. By installing a fabric-covered shelf divider that hangs directly from the closet rod, you create a dedicated space for folded clothes, bulky sweaters, or board games. This keeps the closet floor completely clear. These dividers essentially add a set of drawers or cubbies that don’t take up any extra footprint. You can paint the edges of these cubbies in bright, fun colors, or use fabric scraps to coordinate with your child’s bedding, ensuring the storage solution feels like a natural part of their space.
How to Make
Purchase a hanging canvas shelf organizer. To customize it, paint the edge of each shelf with fabric paint or glue on ribbons in contrasting colors. If the shelves are too deep, add internal cardboard trays to each level to act as pull-out drawers. Hang the unit securely on the closet rod using the provided Velcro or hook system. Ensure the unit is balanced properly so it does not lean. Once installed, use each shelf for a specific category—for instance, one for pajamas, one for school clothes, and one for activewear—making it much easier for your child to dress themselves in the morning.
Things Needed
- Hanging canvas shelf organizer
- Fabric paint or ribbons
- Cardboard trays
- Scissors and glue
- Closet rod

5. Magnetized Metal Closet Strip
When you have limited shelf space, utilizing the back of a closet door or an empty wall inside the closet is a brilliant strategy. A magnetized metal strip can hold so many items that would otherwise clutter drawers or bins. From metal tins holding small toy parts to magnetic art clips that display your child’s latest masterpieces, this is a highly modular system. It is also completely adjustable as your child grows; what once held toy cars can eventually hold school notes or metal desk supplies. It keeps small, easily lost items at eye level and ready for use.
How to Make
Buy a long, flat metal strip or a magnetic knife rack. Measure the space inside the closet where you want it installed. Use appropriate mounting screws to attach it to the wall or the back of the door. For the storage containers, purchase small magnetic tins. Decorate the lids of the tins with your child’s favorite stickers or paint. Once mounted, simply “stick” the containers to the magnetic strip. Because the strip is metal, you can also use strong magnets to attach paper lists, photos, or chore charts, turning this into an interactive communication center for your child.
Things Needed
- Magnetic metal strip or knife rack
- Small magnetic storage tins
- Mounting screws and drill
- Stickers, paint, or vinyl labels
- Strong decorative magnets
6. Color-Coded Hanger Markers
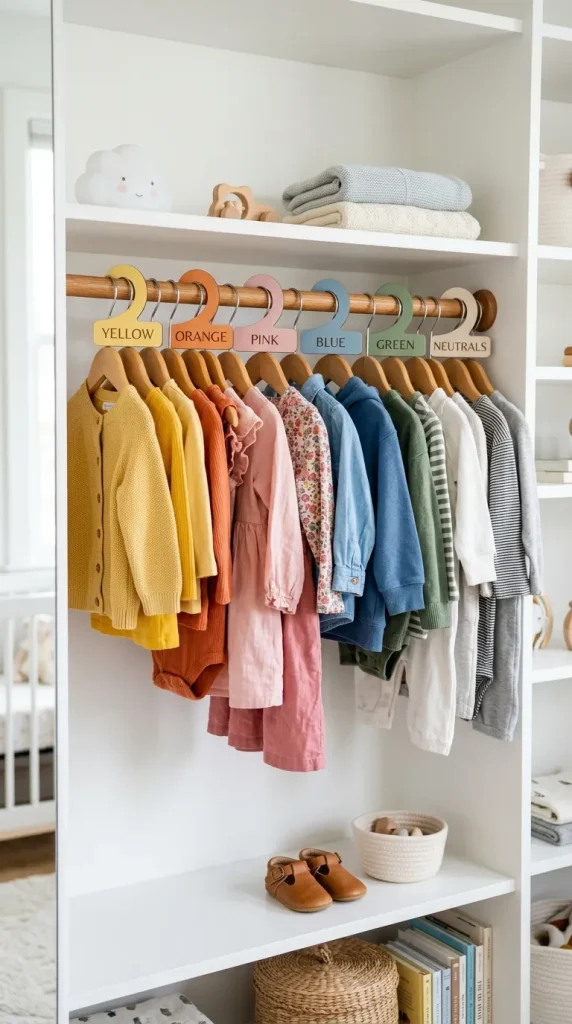
Choosing what to wear is often the biggest hurdle in a morning routine, but color-coded hanger markers can simplify the process immensely. If your child struggles with picking out outfits, you can group their clothes by type or even by day of the week using these simple, removable markers. This organization tool is exceptionally low-cost but high-impact. It helps children learn the concepts of sorting and categorization, and it makes the closet look incredibly tidy and well-curated. When clothes are organized by color or style, it is also much easier for you to see what pieces are missing or what needs to be donated.
How to Make
Buy a pack of plain wooden or plastic hanger tags. If you cannot find them, you can cut small circular tags out of thick cardstock. Decorate each tag with a distinct color using paint or markers. Write the day of the week or the clothing category (e.g., “School,” “Play,” “Dressy”) on the tag. Slip the tags over the hook of each hanger. For an even more visual approach, use symbols like a sun for light clothes or a cloud for warmer layers. This visual system empowers your child to select their own clothes based on the weather or their schedule.
Things Needed
- Blank hanger markers or heavy cardstock
- Acrylic paint or colored markers
- Hole punch
- Scissors
- Symbols or stickers

7. Slide-Out Clear Plastic Drawers
If you find that bins are too messy, the clear plastic drawer unit is the gold standard for visibility. These stackable units allow your child to see exactly what is inside without needing to open every container. They are perfect for closets that have a large, empty floor space below the hanging rod. You can dedicate one drawer to socks, another to hats, and another to seasonal items. The clear nature of the plastic ensures that your child isn’t frustrated by not being able to find something, and it prevents the “out of sight, out of mind” trap that often leads to clothes going unworn.
How to Make
Measure the area of the closet floor and purchase a stackable set of clear plastic drawers that fits the space. If the drawers are wobbly, use museum putty or double-sided adhesive strips to secure them to each other and to the floor. To add a bit of style, you can adhere a piece of patterned paper to the inside of each drawer face to hide the clutter while still keeping the items organized. Label the front of each drawer with a bold, clear label so that your child understands the system at a glance.
Things Needed
- Stackable clear plastic drawer unit
- Museum putty or double-sided tape
- Decorative paper
- Large, clear labels
- Tape measure
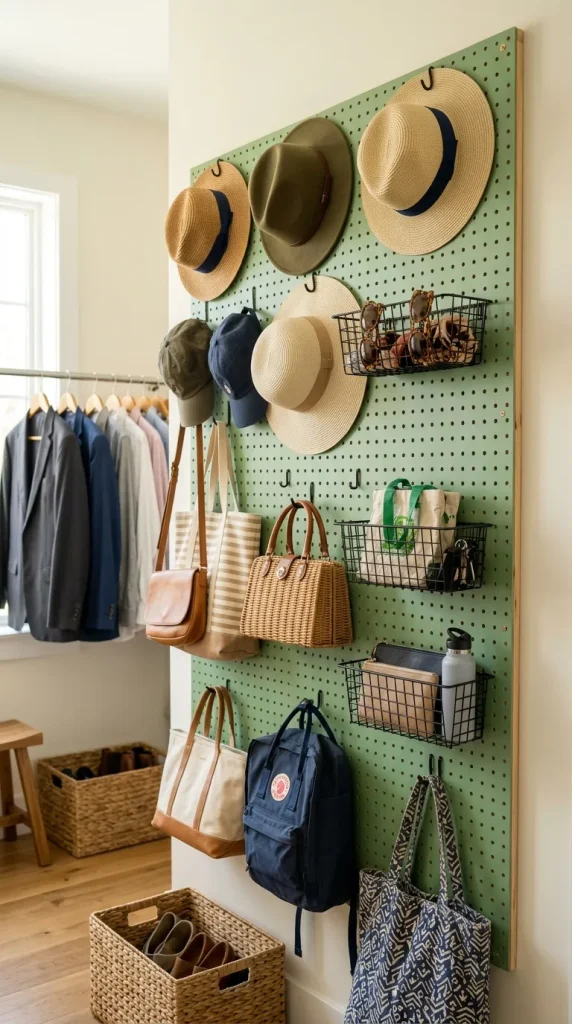
8. Pegboard Accessory Wall
A pegboard is a transformative tool for any closet, providing an endless array of configuration options for hanging items. It is the ultimate solution for holding everything from jump ropes and bags to hats and scarves. By using different hooks and baskets, you can create a perfectly tailored system that fits your child’s unique collection of accessories. The pegboard also serves as a great visual display, making it fun for your child to “shop” for their own gear. It keeps the closet floor completely free and utilizes vertical space to its maximum potential.
How to Make
Purchase a standard pegboard and cut it to fit the back wall or side wall of the closet. Paint the pegboard a bright, fun color that matches the bedroom decor. Mount the board using spacers, which will ensure that you have enough room to insert the hooks. Once it is mounted, experiment with different hook lengths and small wire baskets to hold various items. Use a mix of long hooks for bags and short hooks for smaller accessories. Add labels above each hook so your child knows where each item lives when it is time to put things back.
Things Needed
- Pegboard sheet
- Spacers and mounting hardware
- Assorted pegboard hooks and small wire baskets
- Paint and brushes
- Label maker or adhesive labels
9. Velvet-Lined Accessory Tray
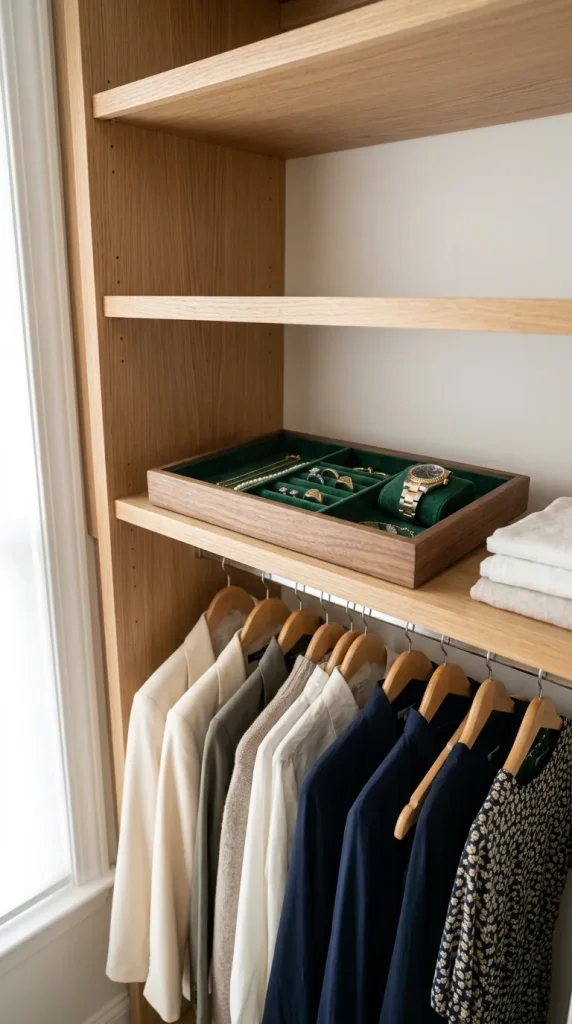
For older children who have begun to collect jewelry, watches, or small trinkets, a simple tray placed on a closet shelf is a must. Instead of letting these items scatter on the dresser, creating a dedicated velvet-lined tray in the closet ensures they stay safe and organized. It teaches your child to care for their belongings and establishes a routine of putting away jewelry when they take it off. You can easily make this look expensive and professional with just a few basic materials from a craft store, and it adds a touch of grown-up style to their closet organization.
How to Make
Find a shallow wooden or cardboard tray that fits on a closet shelf. Buy a piece of self-adhesive velvet or felt. Cut the fabric to fit the bottom and sides of the tray. Carefully press the velvet into place, smoothing out any bubbles as you go. For added organization, use thin strips of foam or cardboard, also wrapped in velvet, to create internal compartments for different types of jewelry. Place the tray on an eye-level shelf. This creates a “special place” for your child’s treasures and prevents those small items from getting lost in larger bins.
Things Needed
- Shallow wooden or cardboard tray
- Self-adhesive velvet or felt
- Foam strips for dividers
- Scissors
- Glue (if the fabric is not self-adhesive)

10. Elastic Ribbon Jewelry Grid
If a tray isn’t enough, an elastic ribbon grid is a brilliant way to display and store headbands, hair clips, and necklaces. This vertical storage method keeps these items untangled and clearly visible. By stretching ribbons across a frame, you create a dedicated “display board” that fits perfectly inside a closet. It is colorful, functional, and very easy for a child to use. It transforms hair accessories into a decorative feature, and because the ribbons are elastic, it is incredibly easy to add or remove items as your child’s collection changes over time.
How to Make
Take an empty picture frame and remove the glass and backing. Buy several rolls of colorful elastic ribbon. Stretch the ribbons across the frame horizontally and vertically, weaving them to create a grid. Staple or hot glue the ends of the ribbons to the back of the frame. You can adjust the tension of the ribbons depending on how heavy the items will be. Once the grid is complete, hang the frame on the inside wall of the closet using a command strip. Your child can simply clip their hair bows onto the ribbon or hang necklaces over the grid.
Things Needed
- Empty picture frame
- Colorful elastic ribbons
- Staple gun or hot glue gun
- Command strips for wall mounting
- Scissors
Conclusion
Achieving a clean, stress-free space for your child doesn’t require a professional redesign or an endless budget; it simply requires intentionality and the right tools. By integrating these ten kids craft closet organization projects into your home, you aren’t just tidying up—you are building a foundation of order and independence that will serve your child for years to come. Whether you opt for simple bin dividers, a custom pegboard, or colorful hanger markers, the goal is to make the systems intuitive and accessible. As you start this journey, remember to involve your child in the process; when they help select the labels or place the organizers, they are far more likely to take pride in keeping their space neat. With a bit of creativity and consistent practice, a cluttered closet can become the most functional room in your house, making your daily routine smoother, faster, and much more enjoyable for the entire family.